Johnny Elwyn links to resources for learning and using ACES Color Management
I have never had to use ACES, but here Johnny Elwyn links to a bunch if resources if you do.
I have never had to use ACES, but here Johnny Elwyn links to a bunch if resources if you do.
Neil Oseman has a great article from April on Is Modern Cinematography too dark?
An interesting read, though I don’t think it goes into a main reason behind much of the issue. The color bay. Color bays today use the absolute best top of the line equipment, the best and brightest monitors and it is done in a dark room. This method of color correction makes great results for the theatrical experience, where the lights are off, and it is a very dark environment. In this “perfect” situation you can make the image much darker than you maybe should, especially for a TV show.
If you are delivery for a home experience, you should use a lighter room, because that is what most people do at home. Heck at home I have my iPad half the time, so another bright screen. I hate when a show is so dark that you are forced to turn the lights off just to see anything (I can except it with a movie, but not TV).
Oseman talked about the Game of Thrones final season which was so dark it was a joke, and then concludes that it is what the cinematographer wants, but again they should then correct in ideal situations for how they are delivering.

Simon Wyndham at Redshark has a sponsored look at the the new ColourLab 2.0 Public Beta.
I have to admit the AI powers of ColourLab 2.0 look very impressive, and I love that they have added Adobe Premiere and Apple Final Cut Pro integration instead of just DaVinci Integration.
Colourlab is a subscription for creator which is $129 a year for Premiere and Final Cut, $299 a year for Pro which includes DaVinci or $599 for a permanent license, which is by far the best deal.
I watched the new Dune at home on HBO Max, being a huge fan of the original David Lynch version, and having read all of Frank Herbert’s original novels around the time the original film came out.
I still am trying to wrap my head around the fact that they Shot the film on ARRI Alexa LF for the most part, then color graded in DaVinci Resolve, then scanned back to 35 mm film and then scanned back for grading. Which is to say at the least an incredibly expensive process. And how did it integrate with FX, did they do the scan first or after effects were added?

What this sounds like is it takes a sequence from DaVinci Resolve and then can quickly match it to a look that you show it, and it does it with standard corrections that can be sent back to Resolve without using XML at all and it puts the grade on nodes.
It is supposed to be perceptual matching of shots to reference shots. Obviously I need to try it out before I can comment on how it works, because I have just watched a few videos on it for now. And most impressively is how it creates 8 versions of the match so you can pick your favorite.
The video above is pretty long winded, but very interesting. I certainly want to give it a try.
Jonny Elwyn has a great and extensive article on Affordable Colour Grading Monitors, from computer Monitors to high end color correction screens. This is a seriously in depth article, and I wish something like this existed when I got my last monitor.
I just got a Samsung because it at least it has a blue only mode which certainly helps with color correction.


After all the talk of gamma shifts and trying to balance the color on your computer monitor, really and truly the only way to really see if your video is right is to be watching it on an external video monitor. An external video monitor is the way to see what the image truly looks like, but you need to adjust your external monitor to correct balance and to really do that to the best that your TV can do you need Spear & Munsil. Of course some people use a computer monitor, but that will never show what TV delivery will look like, you need to view on something that resembles what you are delivering for.
I use a Blackmagic UltraStudio 4K to play my video out, though I wish I had the newer model with Thunderbolt 3 instead of 2, and which is smaller, quieter and cooler, but the Ultrastudio works great.
You should be viewing your video on an external studio video monitor, but for home use that is a pretty big expense. Personally I use a Samsung UHD TV, unfortunately it’s HDR capabilities are fake (I had to get it for a job and it was the right price, and it listed HDR, but unfortunately is not actually an HDR display). It is a Samsung so it has one unique bonus among consumer televisions for getting the color correction right and that is that it has a blue only mode. This helps in the calibration greatly.
The discs no longer include a getting started guide, so you will need to go online and follow the extensive instructions. It will take a little while, and your room should have the lighting that you will use when editing (I have light blocking shades on my office windows to keep a consistent color and lighting).
This is such an important step for television delivery, and should part of every editors home office.

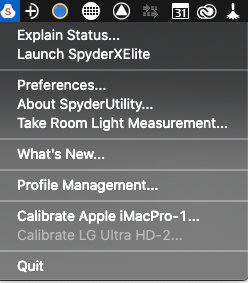
As an editor, colorist and motion graphics artist, I of course use dual monitors. And they are 2 very different displays, but even if they were the exact same type of display you need to try and balance them as mush as you can, and that is why I own and us a datacolor Spyder X (and yes the printing is smudged and coming off on mine).


It measures both displays, has you set matching brightness, and then lets you adjust based on perception. It can be difficult if you have very different displays but is certainly worth it so your 2 displays are as close to each other as can be.
My only complaint is that having bought the device, the software is linked to my computer. And I would love to be able to take it with my to match monitors at work, especially with rental computers, but obviously they want them to buy there own, unfortunately most companies won’t bother.